Showing posts with label 1930 cottage remodel. Show all posts

Sunday, December 4, 2011

Houston---We have lift-off!

Well, not exactly as exciting as a space launch, but getting hot water into the kitchen here at the Two Sisters Cottage is big big news indeed! For months we've had to resort to freezing water from the faucet outside or the little sink in the cottage to wash our hands, clean paint brushes and general washing up. This morning we had running water in the house for the first time in over five months. And after we fired up the new Titan electric tankless water heater, we had HOT water in about 2.5 seconds. Now THAT'S what I'm talkin' about!

Here's the Husband, clowning around:


Oh, yes, you'll also notice that we now have countertops---another "luxury" that I've been waiting for. After a lot of indecision and pondering, we decided to go with some simple pine planks we sealed with a clear Minwax Polyurethane. New wood is so light compared to the old antique wood, but after the finish, it was very similar to the antique pine floors in the living room, right next door. Yay.


In general, I shy away from non-water based products, but in this case, with all the splashing that goes on around a sink, it was necessary. We NEVER place food directly on our countertops, we don't cut on them, etc. so I'm not worried about any issues with toxicity. Application went on with lots of ventilation, fans, air cleaners, open windows, etc.


We found that a drop cloth underneath old appliance boxes and plastic buckets can be turned into an impromptu painting area (in our living room).


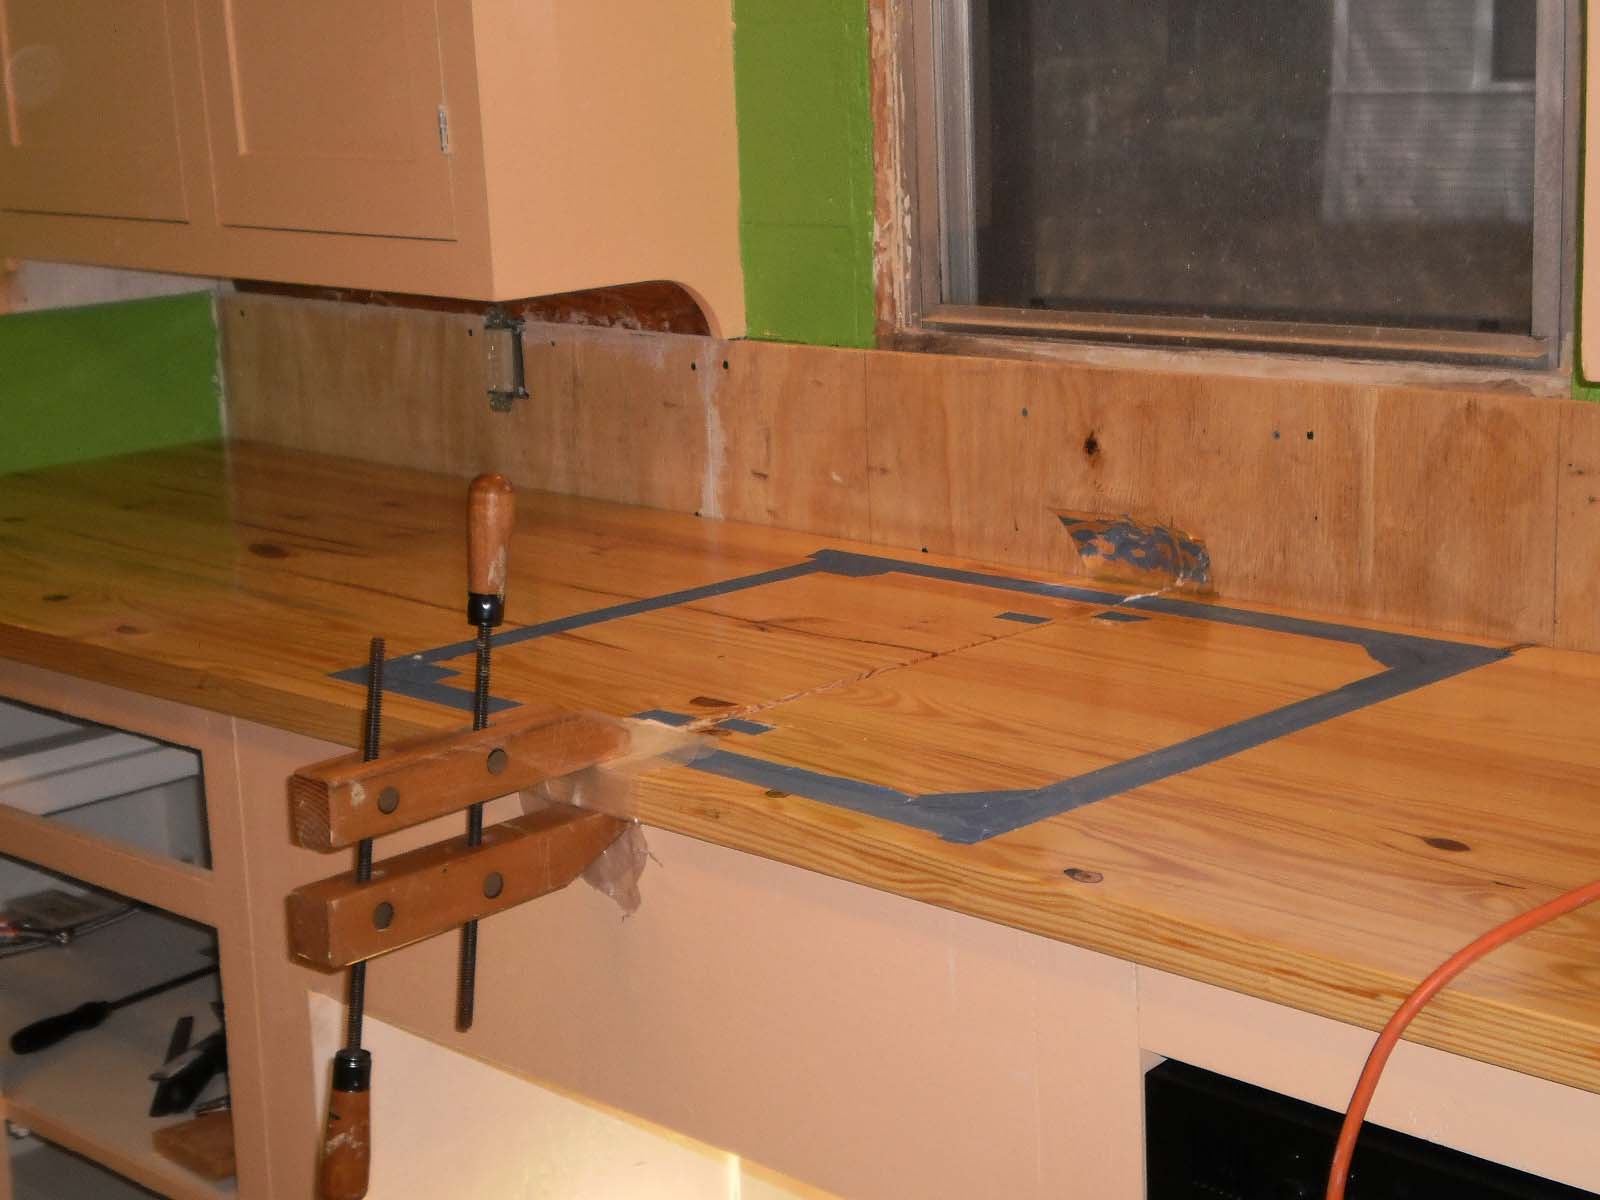
Here's the original dry fit to make sure they're the right size.


Here, we used the blue painter's tape to mark where the hole for the sink was to be cut. Rudy measured MANY times before cutting.


First, he drilled, then he cut. Carefully.


The new sink and faucet were set in, and we held our breath. They fit!


The sink is a small one I found on clearance for $37. I've had huge stainless sinks, and huge cast iron sinks. This time, I decided that I liked the simple one-hole variety better than the others. With a high-neck faucet (great for filling pasta pots), you don't need a sink that's deep enough to float a cruise ship in. The faucet was also on clearance at a greatly reduced price.


While waiting for the finish to dry, Rudy got busy doing some little odds and ends. Like adding the quarter round trim in the dining room. Other than some paint touch-up high on the walls, I declare the dining room finished! (Well, other than the windows, and curtains, and.....LOL)

The kitchen is almost finished. We still have to install the reddish-amber mosaic glass tile I found for the backsplash, put on a few doors, sand the old drawers so they'll slide, trim out the window--and I'm sure a hundred other little details--before it's 100% finished. But that's OK; we'll get there.


I love the little whatnot shelf at the end of the kitchen facing the dining room. It's one of the original features of the house that charmed me. After giving it another coat or two of paint, it was ready for some decorative doo-dads and cookbooks.


And here's an overview of the kitchen, looking in through the dining room. A bit messy, still.


Oh, and remember the pantry? Other than shelves, it's also DONE.


Other work today included installing a pair of wire mesh sliding drawers so I don't have to crawl inside the cabinets to retrieve pots and lids, installing the range side countertops and leveling the range, painting drawer fronts and more.

It's cold here, and raining, so we're taking a few days off of the heavy labor and re-grouping and pondering---what's next? To the bathroom!

Happy trails,

bobbi c.

Sunday, October 16, 2011

Kitchen Floor Progress Report

Although it seems like we'll never finish our 1930's cottage remodeling project, this week we've had some major progress because the kitchen and dining room tile installation has been started! This is a multi-step process because of the fact that the house is on a pier-and-beam foundation, and unless you're careful about the materials you use, the tiles can crack later on when the house shifts (and it will shift).

You can see in a previous photo that we had horrible old sheet vinyl flooring in the kitchen, with a layer of 1950's linoleum under it. We were happy to find out that we didn't have to remove all that before putting in the kitchen tiles, BUT we did have to put a layer of Hardiebacker cement board on top first.


These 3x5' sheets of cement board weigh about 30-lbs. each, and have to be installed over the vinyl with thin-set mortar then screwed every few inches with heavy duty outdoor deck screws. We got the same advice from everybody we talked to...basically, "Glue it and screw it." LOL. So we did--or more accurately, Rudy did. I was busy working on my new vampire comedy play Kindle e-book. After they were screwed down, the joints in between were sealed with more thin-set mortar and adhesive wallboard tape.

FINALLY, we were ready to lay tile. After much deliberation, we choose an inexpensive neutral porcelain tile from Lowe's and are laying it in a running bond (or brick) pattern so it will be more interesting.


Two hours later:


If you've ever laid your own tile, you know what a backbreaking job it is. We've done a lot of tile over the years, so decided to do this job ourselves, too. I'm going to use the same tile in the bathroom.


Here's a photo of the dining room looking into it from the kitchen and living room area. The tile will continue into there.


Since my "office" was in a corner of the dining room, I had to move to the utility room because of the tiling. Here's a photo of my new temporary office, in a corner of the utility room. Love those windows!

Although the front/entry room was to be my office, I'm rethinking that. I've been sitting here for several days, and really enjoy the view to the back garden that I don't get from the front, where I see the porch and the street. Nice view, eh?


If I can negotiate with the cats, who will be making good use of the utility room (their litter box will be in a former coat closet), I might add a small desk or table back here permanently, and just rove around with the laptop, depending on the season. Why not?

And speaking of the garden, we did get some rain, and all things green are popping out all over. More rosebushes are blooming:


And more mysterious flowers have popped up. Are they Japanese lilies? Rain lilies?


Whatever they are, I'm seeing them bloom all over Taylor right now, so there must have been some kind of flower bulb sharing thingy going on at one time.

NOTE: A friend just identified them as Schoolhouse Lilies (because they usually bloom in August when school starts again), or Oxblood Lilies. Thanks, Debbie!

My little veggie garden is doing well...potted peppers and eggplants continue to bloom and set, new greens are growing well, and my chocolate cherry tomato bush has a bunch of tiny green 'maters on it. Nice!

Until next time....happy trails from Texas, where it's 88-degrees!

bobbi c.